A coffee table-top made with wood is simple and elegant. But adding epoxy to that standard table-top can really take it to the next level. A beautiful epoxy touch to your coffee table will make it stunningly beautiful and intricate.
Epoxy can make wooden furniture look vintage yet futuristic, classic yet full of a dreamy aura. There’s not much else that can match the chaotic perfection of an epoxy look in the home.
But making a coffee table-top with epoxy isn’t exactly a straightforward process. However, with the right guidance and some patience—it could be done.
Today, we’re going to show you how to make a coffee table-top with epoxy.
Step One: Preparation
First, you’re going to want to get your table-top ready. This step isn’t too difficult.
You’re going to pick up a wooden board of your preferred size (you could disassemble your current coffee table). Put it over somewhere you wouldn’t mind getting messy. We recommend putting down a tarp on a workbench or the floor.
Sand down the entirety of the wooden board.
Step Two: Getting the Epoxy Ready
You have to prepare the epoxy liquid yourself. We recommend using this resin from ProMarine. It’s a premium product that’s designed with table-tops and wooden furniture in mind. The formula used allows for minimal bubbles, fish eyes, and craters.
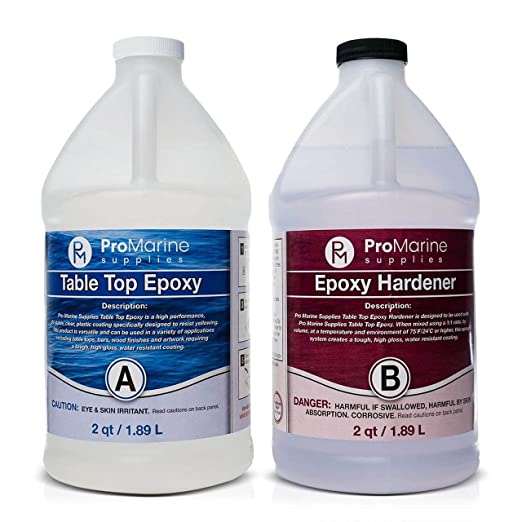
It’s also manufactured in the USA and has no odor.
Another bonus with this resin is that the mixture ratio is straightforward. You have to carefully measure how much A & B liquid you use with other resins. There are very specific ratios that must be followed or the epoxy won’t look good. The ratio between A & B liquid with this epoxy resin is 1:1. This is extremely simple, especially for first-timers.
Carefully follow the ratio and pour both liquids into one cup. Mix the resin well with a stick and then pour it into another cup. Take a white primary FX mix and pour it into the new cup. Mix well.
Step Three: Start Applying the Resin
Next, you’re going to pour the resin onto the coffee table-top. Spread it evenly across the table-top with a brush. Make sure to get the edges as well.
If possible, take a blowtorch and apply heat across the table-top to ensure there are no bubbles. Mix more epoxy with the correct ratio and pour it out across any number of cups. Each cup is a color that you would want to apply to your table. Use FX metallics and apply one color to one cup. Mix well with a stick.
Pour the colors into a PVC tube on top of the table. The tube should be completely straight so as to not have any leaks. The tube should be open on both sides. Let the colors mix with each other.
\ Drag the PVC tube across the table-top. There should be a ton of epoxy across the table-top. Grab hold of the entire table-top and tilt it. Get the resin where you want it to be. Blowtorch it again and spray some alcohol on it.
Step Four: Detailing
Let it all sit for a few hours. Not overnight, just about 4-6 hours. Saw off any of the hanging resin crystals. Sand down the table-top again. Take a wet rag and wipe down the entire surface.
Apply a clear coat to the surface and use a brush to spread it out. Use the blowtorch one last time and the table-top should be clear as glass.
Let it all sit until dry and flip it over. Sand the bottom of the table.
Install the table legs or reassemble the table if you took one apart.
Your table should be good to go!