Jewelry soldering is an important technique to know when making jewelry. It could take you to the next level of creating beautiful pieces of work that you can be proud of.
Soldering lets you join different metal parts together into one. This opens up a whole new world of possibilities when making jewelry. You can use this technique to create more customized or sophisticated pieces.
Whether you’re an experienced jewelry maker or just starting out, soldering is a skill worth learning. Read on to learn how to solder jewelry. We break down jewelry soldering in 6 easy steps.
The Materials You’ll Need
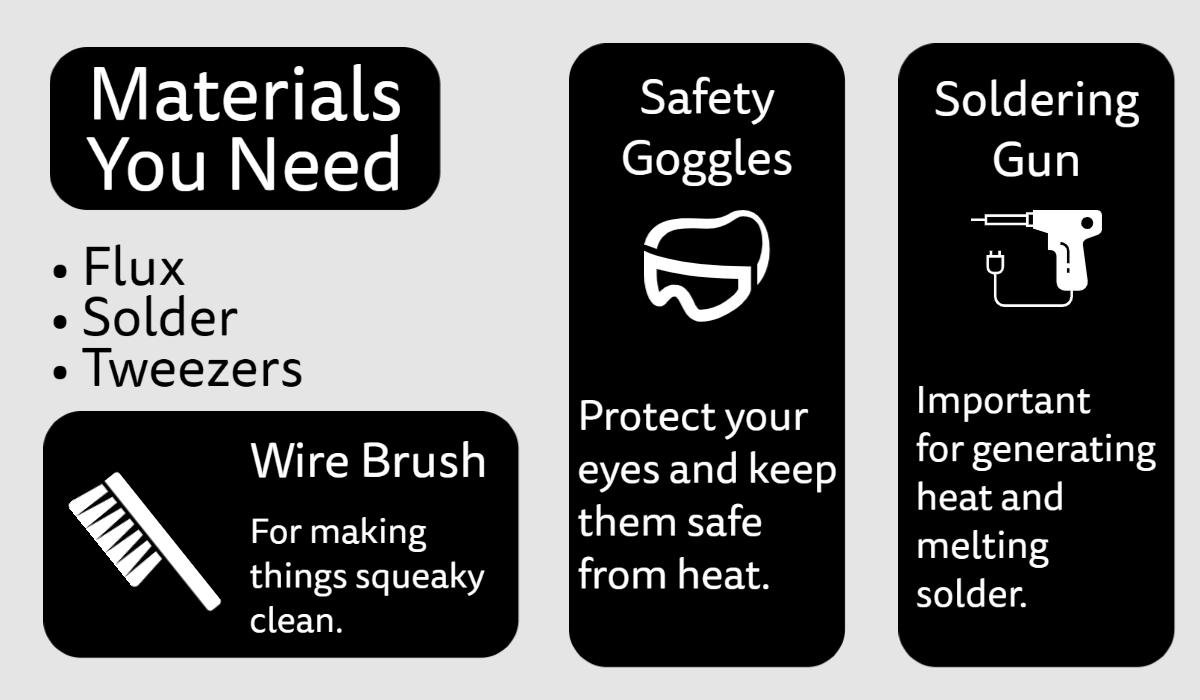
Before we get started, it’s important to have all the materials necessary. Here’s a list of what you’re going to need:
Solder
Solder is a thin metal alloy that’s used to join metal parts together. It’s typically made of a mixture of tin and lead, but there are also other options on the market. Solder is the star of the show when soldering, so investing in a good option is important.
Different solders melt at different temperatures and they come in different sizes. It’s important to pick the solder that’s right for you. Solders with a higher melting point are better for joining metal parts that will be subjected to stress. Solders with a lower melting point are more viable for joining metal parts that won’t be subjected to as much stress.
Click here to check out a good solder option on Amazon.
Flux
Flux is a substance that is used in soldering to promote the flow of solder and prevent oxidation. Flux is important since it serves many functions in soldering.
Firstly, it cleans the surface. It removes any oxidation, oil, or other contaminants from the surface of the metal which can help ensure a strong bond between the solder and the metal.
Secondly, it prevents oxidation. Metal can oxidize which might ruin the quality of the metal. Flux acts as a barrier between oxygen and the metal. Oxidation might cause discoloration or weakening of the metal.
Thirdly, it promotes wetting. It’s important to spread solder evenly and to wet the metal.
Lastly, it enhances flow. Flux helps molten solder flow more easily and fill in any gaps or cracks in the joint.
There are different types of flux out there with their own specific properties and uses. You can learn more about flux when you know more about soldering, but for right now we would recommend this flux on Amazon that’s great for jewelry.
Soldering Gun
A soldering gun is a tool that generates heat and melts solder. It is essential in soldering as it gives you great control of where heat goes. They typically consist of a heating element, a trigger, and a metal tip. The trigger sends heat from the heating element to the metal tip.
Soldering guns are great for their ability to access hard-to-reach places and have a controlled source of heat. The heating element is capable of quickly reaching high temperatures.
Click here for a soldering gun on Amazon that’s comfortable to hold and easy to use.
Tweezers
Tweezers allow you to hold jewelry in place when soldering. It’s important to have a comfortable pair of tweezers that can really grip on to the jewelry you’re working with.
Here’s a good set of tweezers on Amazon that will help you get the job done.
Safety Goggles
Keeping your eyes safe is an important part of soldering. Safety goggles can protect your eyes from the intense heat of the soldering gun.
These safety goggles from Cordova are a great option. They’re protective, comfortable, and scratch-resistant.
Wire Brush
A wire brush is great for cleaning metal. You’re going to need to clean the metals very often so having a comfortable and sturdy wire brush is important.
Click here for a great set of stainless steel wire brushes for soldering.
1. Gather Your Materials
You’re going to get all your materials in one place. It’s best to work on a flat surface that has great lighting.
It’s also important that you’re comfortable. You need to be able to hold steady.
Something you’ll need that we didn’t mention earlier is a jar or cup of warm water with dish soap. Anything should work fine!
2. Clean the Metal Parts
Before soldering, it’s important to make sure that the metal parts that will be joined are clean. It’s important for them to be free of any dirt, oil, or other contaminants since they might interfere with the soldering. Contaminants can weaken the joint.
You can use a wire brush to clean the metal parts. Gently scrub the metals, and the wire brush should be sturdy enough to clean everything up. Maneuver it into every nook and cranny.
You can also leave the metal parts in the jar of dishwater for about a minute or two.
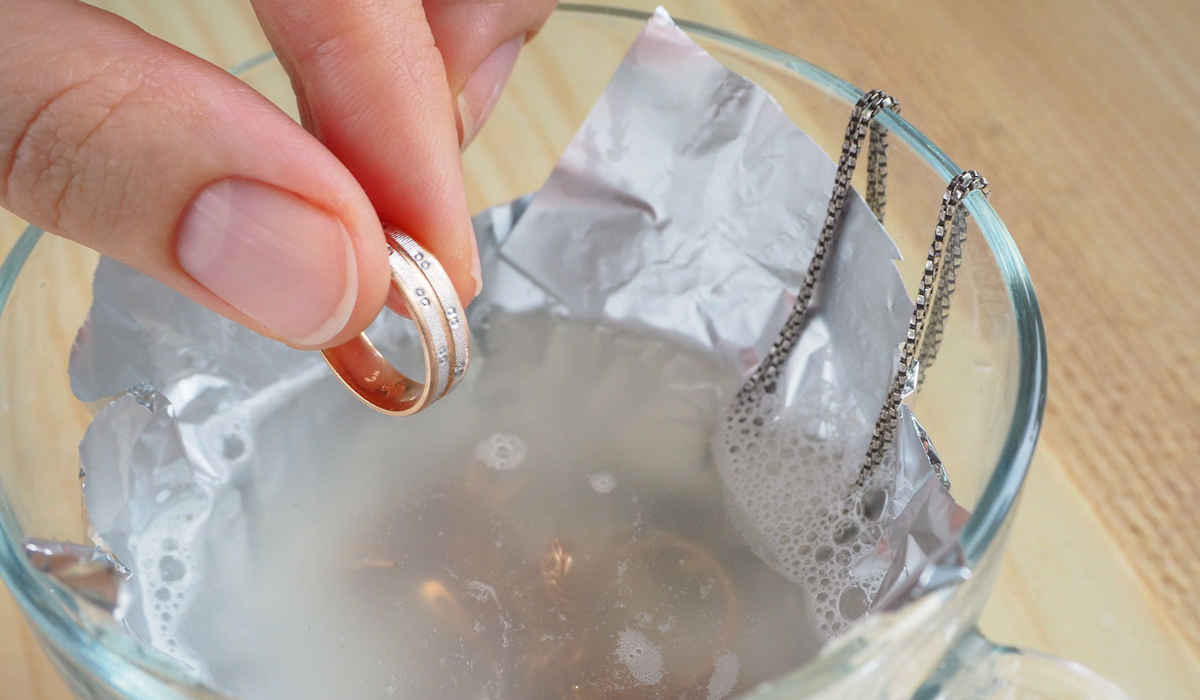
Once you’re done cleaning the metal parts, try to avoid directly touching them. Even the oil on your fingers can interfere with soldering. This would be a great time to start using the tweezers.
3. Apply Flux to the Joint
Now it’s time to apply flux to the joint. Flux is used to help the solder flow and adhere to the metal, so this step is important for the finished product’s quality. Flux also prevents oxidation and other forms of corrosion.
To apply flux to the joint, you can use a small brush or a cotton swab. It’s important to apply enough flux to cover the entire joint. Don’t be too excessive, though! It shouldn’t drip or run. If flux gets on anything other than the joint, then it might cause discoloration. It’s difficult to remove, so it’s better to prevent this problem from happening at all.
Once you’re all done with that, you’re ready for the next step.
4. Apply Solder
Applying solder is an important step in the process. Use your tweezers to grab small pieces of solder and place them on the joint where you want to merge the metal pieces. Correctly grabbing and applying the right amount of solder takes practice. Keep in mind that a little bit of solder can really go a long way!
5. Heat the Metal Parts
You’re ready to heat the metal parts! This is done with a soldering gun.
Turn on the soldering gun. Start heating the metal parts evenly. Try to keep the metal tip pointed directly toward the metal joints. Heat the joint from all sides.
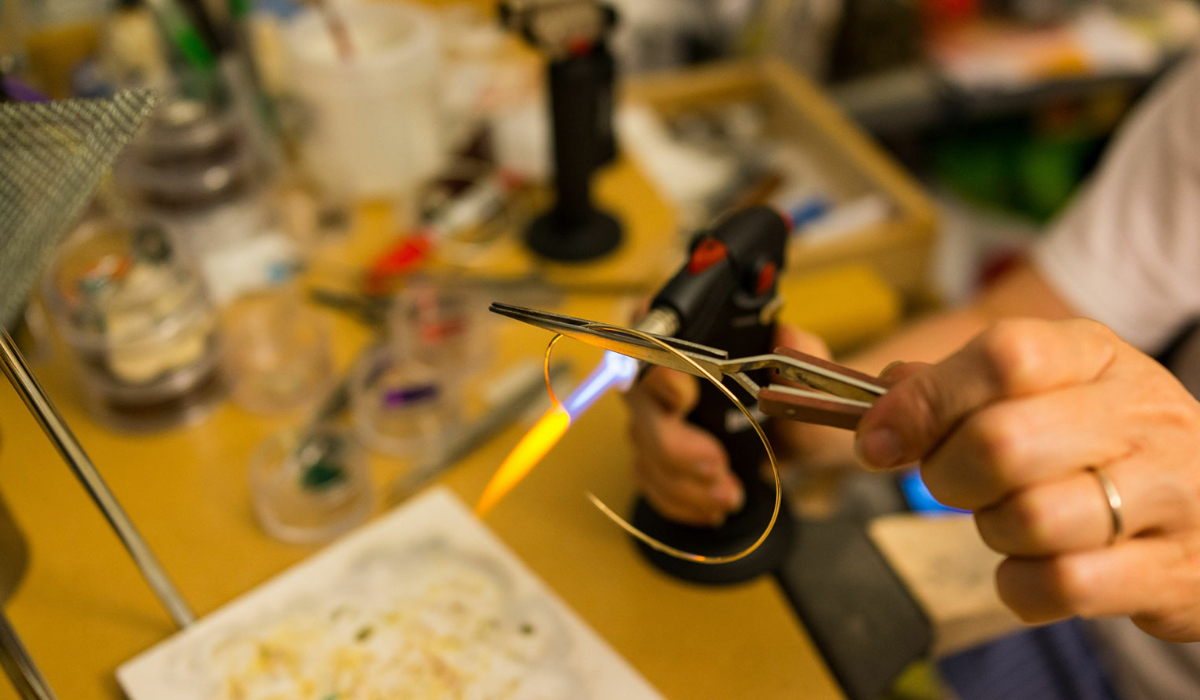
You should heat the metal parts at a low temperature and gradually increase the temperature until the solder melts.
The solder should flow evenly and create a strong, uniform bond.
6. Clean the Jewelry Again
You’re almost done! Now you can clean the metal parts to remove any residue.
Immerse the metal parts in a picking solution or wash them with soap and water.
Inspect your jewelry to ensure that the solder has adhered properly. The joint should be strong and secure.
Conclusion
Knowing how to solder is an important skill in jewelry making. Jewelry soldering seems intimidating, but it’s a lot more simple than you think.
Now that you know all about jewelry soldering, your jewelry is going to look a lot more sophisticated.
Have fun creating beautiful pieces of jewelry!