Congratulations! Because if you have reached the stage where you are now ready to set up your own photography studio then it means you have also mastered your passion for photography to a great level. And that calls for cheers. Having a controlled environment to capture stunning pictures is every photographer’s dream. And that is possible in a studio where the photographer has all the control. So without further ado, let’s find out How to Set Up a Professional Photography Studio at Home.
Now that you are ready to create a studio for yourself where you can work in a controlled environment, you need to dig deeper into your pockets. Because having a studio would definitely demand some heavy investment, especially if it includes rent. But that’s where an unused room of your home will save you from splurging too much. This way you would still need a budget, but even with a limited budget, you can create a studio of your dreams.
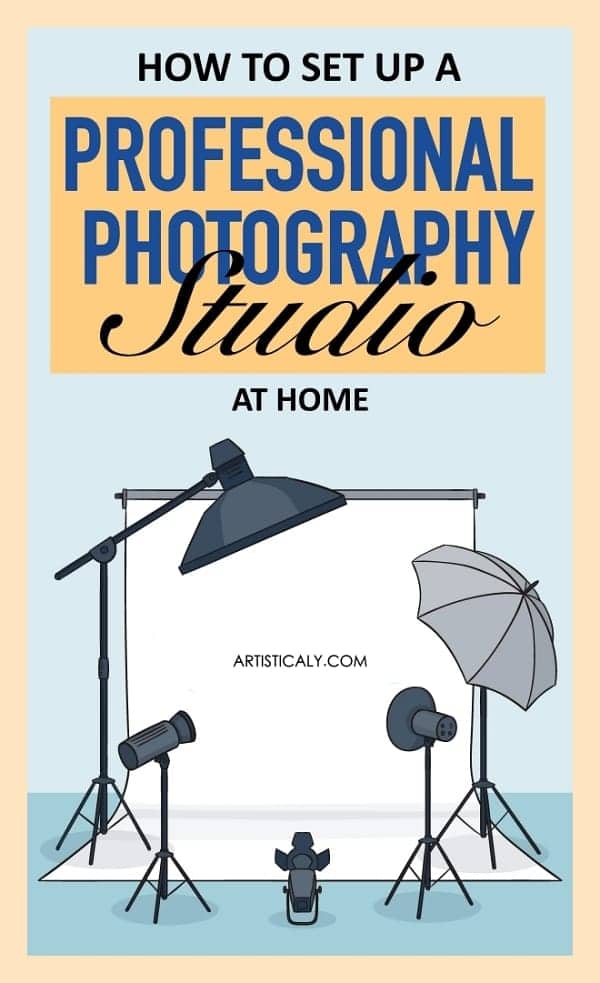
How to Set Up a Professional Photography Studio at Home

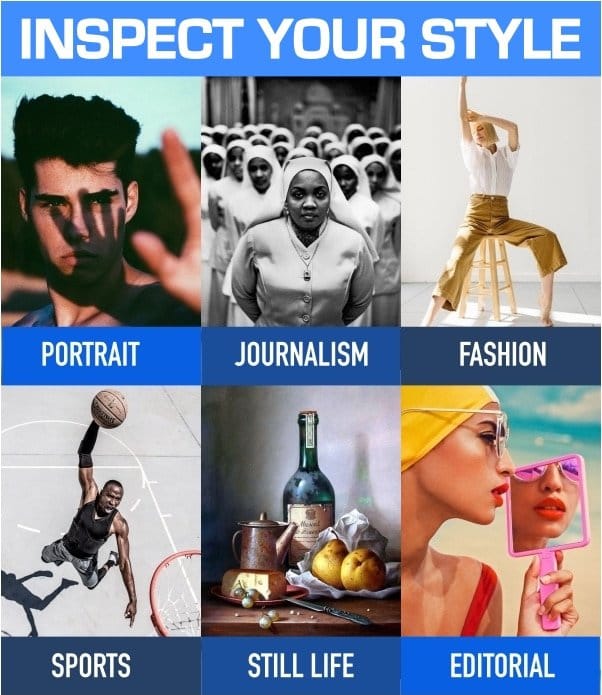
Understand Your Photography Style and Interest
Why are we talking about photography style instead of jumping to the steps of creating a studio? Because if you are a photographer who does natural photography then that wouldn’t be possible in a studio. A photography studio is actually best for headshots, portrait photography, and some other photography styles where you need to control the lighting to a great level. But don’t let that deter you from trying your hand in several photography styles. You should rather seek inspiration from the experts in this field but don’t follow their steps. You would stand out among others only when you pave your own path. So do see what others are doing but don’t hesitate to add your own creativity.
And when it comes to creating a studio, it might be possible for you to create one outdoors as per the situation. Having a portable studio would help in such times. However, we would focus here on creating a studio in your home. While turning your unused room into a studio, you would need to take your photography style into consideration. For instance, if you are into clicking headshots mostly then that would work with a small studio. But if you like to add natural elements in your pictures then a large studio with even larger windows is what you need.
Large Photography Studio or Small Photography Studio?
If you're curious about How to Set Up a Professional Photography Studio at Home, then, you must start with the Area Factor. Because the Photography Equipment, props, and other additions are directly connected to the area you have.
Depending on your photography style, you would need to decide the size of your studio. A big room would mean a bigger investment and you don’t want to spend on things that wouldn’t be of any use to it. So if you want to add family or wedding photoshoots, maternity photo sessions, or model photos to your portfolio then a small room wouldn’t make an efficient studio. Besides this, you would also need to consider the elements that you add to your photographs. For instance, if you like to include natural light in your photos then having a large space for a studio would be ideal. In both the above scenarios, you would need a large room having big windows to convert it into a studio. And when you want to get rid of ambient light then you can always use curtains or flags to shield the windows.
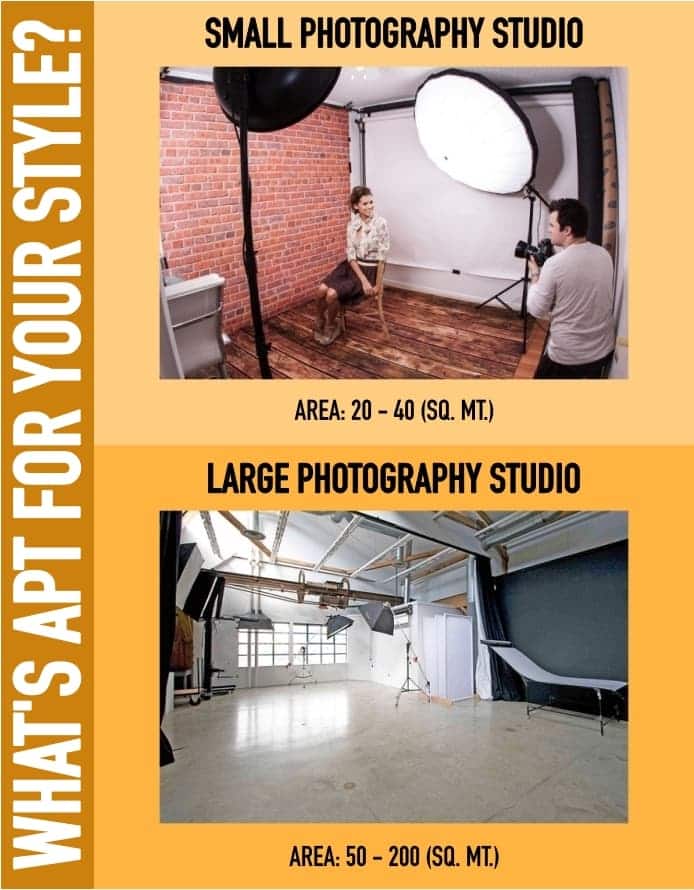
A small studio space would work best if you are more into clicking headshots and portraits. Even if you are doing pet or newborn photography, the small studio would work more than fine because neither of these cuties takes much space. Also, if your signature style is clicking dark and moody photos then you need a space where you can block out ambient light. A small studio is your answer then.
So while deciding on the size of your photography studio, think of your photography style and what you want to achieve in your studio. And then decide if you want a few square meters or more than 200 square meters for your studio space. Also consider the comfort of your model, space for you to clutter with your gears and tools and a cozy breathing space for you to work your best while thinking of space for the studio.
Home Photography Studio Equipment
Be it a small studio or a large one, there are some basic tools and gear you would need to invest in. Here is a list of items you would need to shop for.
Best Lighting
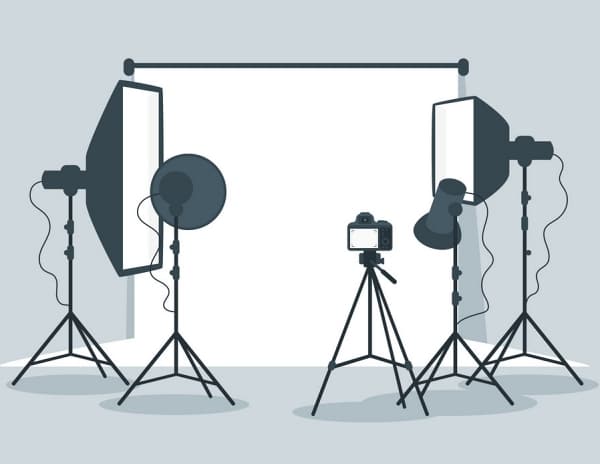
For lighting, you have great options in speedlights and studio flashes. For a small studio, speedlights are the ideal option as they are lightweight and small. Not to mention they are cheap. But speedlights have some flaws which can be overcome with flash units but they are quite expensive so you might not be able to afford them at first. Besides these, you also have the option of LED lamps and strobe lights. You can work with only one light but the experts suggest having at least three lights for a better lighting system. So if you are a beginner, start with one light and then keep on adding them.
Light Stands
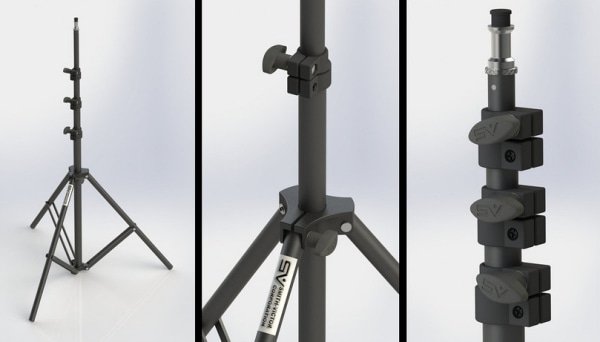
Whether you are using speedlights or flash units, you would need light stands for them. And don’t give in to the temptation of saving money and buy cheaper stands. They wouldn’t be of use when your light is unstable. Also, the heavier your lights are, the sturdier your light stands must be.
Light Modifiers
Light modifiers can create amazing effects in your photos. So it is actually a fun part to play with light modifiers and setting them up in your studio. However, different modifiers give different effects so choose the ones that you would really want.
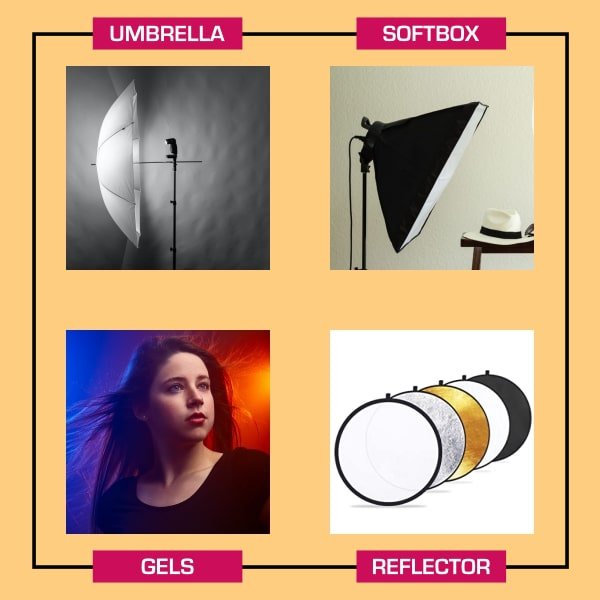
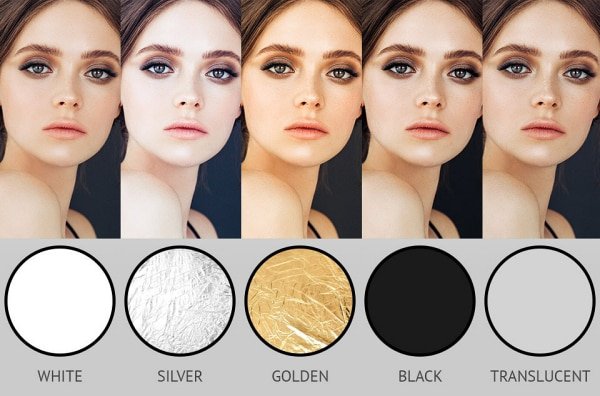
- Reflectors: They are must in the list of light modifiers. They bounce the light back into the scene and create either cool or warm glow depending on the reflective surfaces used in the reflector.
- Umbrellas: They diffuse and soften the light but they are best used for a large space.

- Softboxes/Octaboxes: These are the more advanced and expensive versions of the umbrella which diffuse the light and give you better control over lighting.

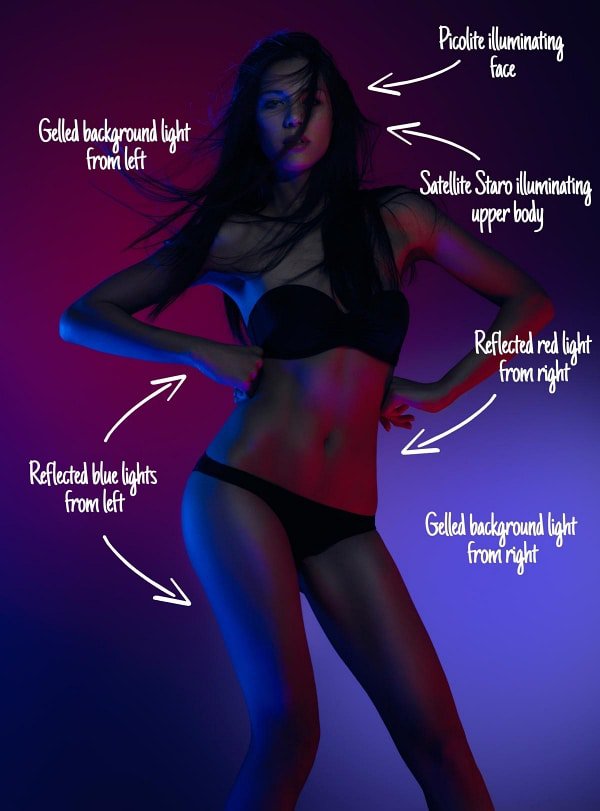
- Gels: These are actually color papers that help to change the color of light sources. They are amazing to work with and get some great effects and the best thing is that they are cheap too.
Background
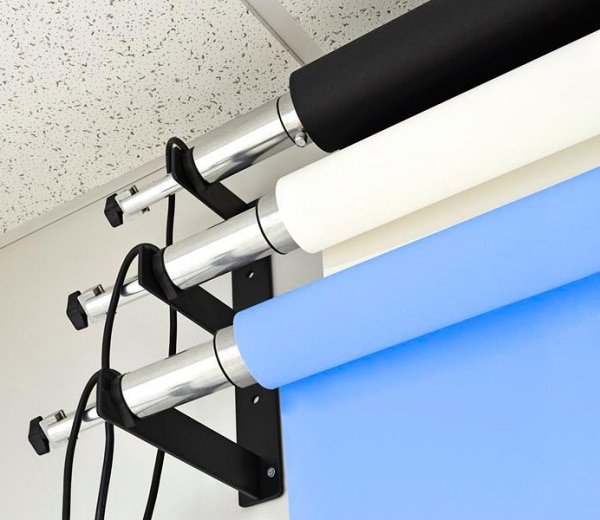
It is better to start with a collapsible background as they are cheap and gives you the option of both the black and white backdrop. Later you can switch to the professional portrait background which you would need to install permanently on a wall or ceiling as it is heavy. You have many options when it comes to background colours. We would suggest going with a neutral color and then using gel to change the color of your background.
Fans
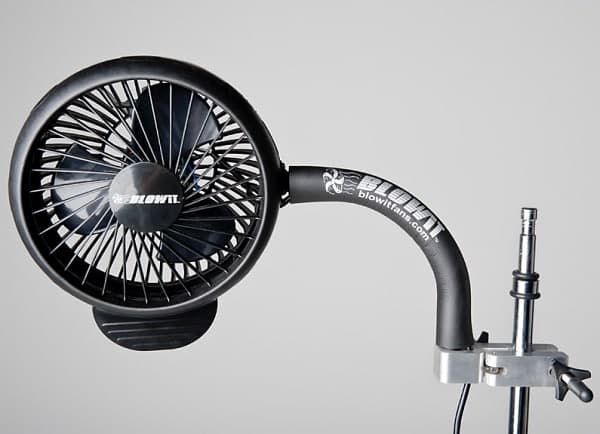
Your studio will start burning up with too much heat because of the continuous lightings, especially if you have a large studio with high power lights. Fans will, therefore, come in handy to reduce the heat of the room and sometimes to add hotness to your pictures by blowing your model’s hair. Wink! In either case, fans would be a worth it investment.
Props
It will depend on the concept of your photoshoot that what kind of props would you need. It can be anything from furniture to clothes and accessories to books and toys and what not. Don’t hesitate to introduce props in your photography as they add more depth in the pictures. So keep some props ready for such times.
What more to add to your home studio?
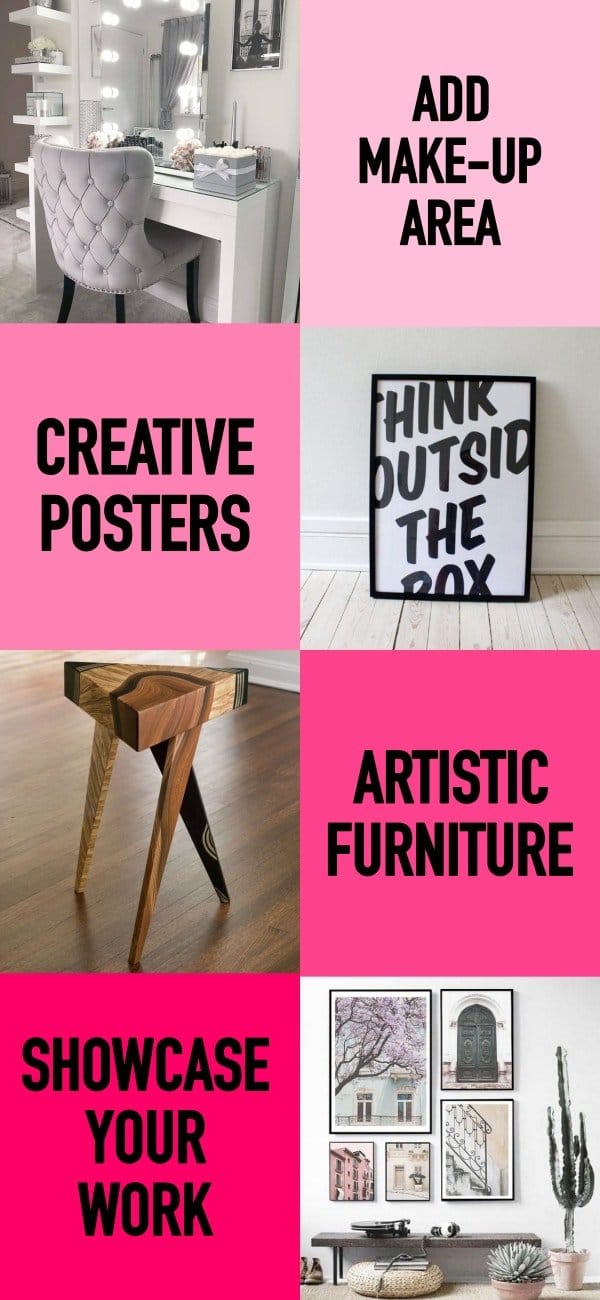
Nothing in life is ever enough and so they say the more the merrier. So what else can you add to your home studio beside the basic equipment for a photography studio? Think out of the box. You want your client to leave your studio with a big smile and some great things to say about you so you can get that mouth to mouth promotion. That is why you need to ensure their comfort. Keep a small section of the room with a funny banner saying ‘Bite Please!’ and have a table set up here with some snacks and water. Things can take too long sometimes so keep your client happy and refreshed with this. Keep a small makeup area as well where you can set a mirror along with some basic makeup products so your client can do a last-minute touch-up. Also, show off some of your work by displaying some of your best shots on the wall.
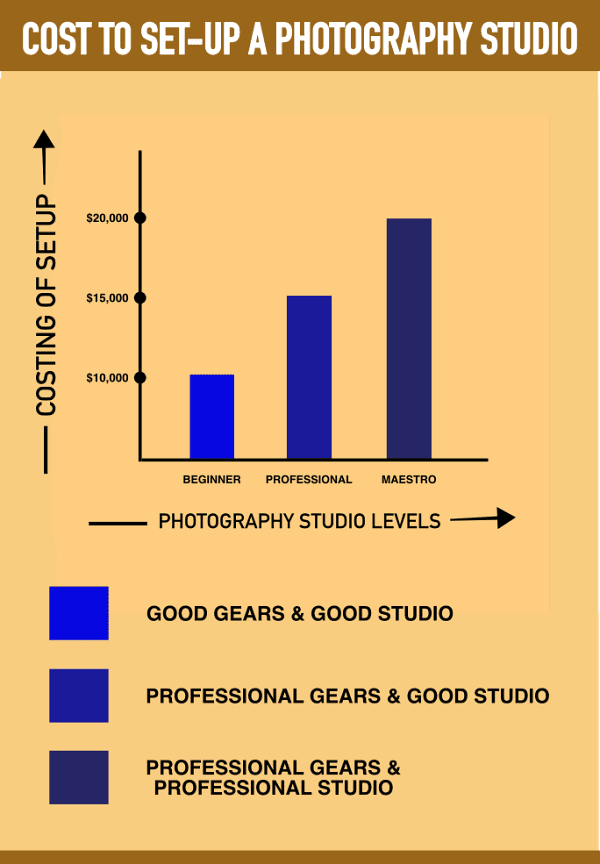
How much does it cost to set up a photography studio?
More than any point regarding How to Set Up a Professional Photography Studio at Home, you initially consider the costing. Because abnormal or unplanned costing can put a huge load on your responsibilities and that can affect your work quality as well.
There is nothing like one shoe size fits all when it comes to setting up your own photo studio. A lot of factors are involved in it so the number of dollars would always vary from person to person. Many professional photographers suggest starting with a minimum budget of about $15,000 to $20,000 and set up your photography studio. You can even start with a sum of $10,000 and then when more gigs start coming up you can invest more in the expensive equipment. Invest in the home photography studio kits to save money and get you started in no time.
Don’t fret about having a perfect studio. If you have just begun and trying your feet in this business then concentrate on building a great portfolio and an even great client list with your small photo studio which might not be the best out there but definitely helps you get the perfect shots.